In this tutorial we will learn how to run a Spring Boot application using Docker using two different approaches: by setting up a Dockerfile and using a configuration option of Spring Boot Maven plugin.
Hard requirements
- A JDK 1.8 or newer to build your Spring Boot application
- A Docker environment on your Machine. As an alternative, you can consider using Podman.
For the purpose of this example, we will use the Spring Boot Command Line interface. You can choose any other option to bootstrap your Spring Boot project.
Create a simple Spring Boot REST Project
Firstly, create a new project which includes the web dependencies:
spring init -dweb demo-rest
Now import the Maven project in your favourite IDE and add a model class named Customer that will be returned by a GET Request:
package com.example.demorest;

public class Customer {
  private int id;
  private String name;

  public Customer(int id, String name) {
    super();
    this.id = id;
    this.name = name;
  }

  public String getName() {
    return name;
  }

  public void setName(String name) {
    this.name = name;
  }

  public int getId() {
    return id;
  }

  public void setId(int id) {
    this.id = id;
  }
}
All you need to build a Rest Service in Spring Boot is a RestController:
package com.example.demorest;

import java.util.ArrayList;
import java.util.List;
import org.springframework.web.bind.annotation.RequestMapping;
import org.springframework.web.bind.annotation.RestController;

@RestController
public class CustomerController {
  @RequestMapping("/")
  public List<Customer> findAll() {
    List<Customer> customerList = new ArrayList<Customer>();
    customerList.add(new Customer(1, "frank"));
    customerList.add(new Customer(2, "john"));
    return customerList;
  }
}
RestController : The @RestController annotation provides a combination of @ResponseBody and @Controller annotations. This is a standrd option to create REST Controllers.
RequestMapping: The method with @RequestMapping would handle a generic request to the “/” URI. If not specified, it maps a GET Request.
Now compile and package the application with:
$ mvn clean install
Let’s check the two available approaches for building a Docker image of our example application
Option #1 Create a Dockerfile
Firstly, create a file Dockerfile in the project root folder with the following content:
FROM adoptopenjdk/openjdk11:alpine-jre
# Add Maintainer Info
LABEL maintainer="marchioni.francesco@gmail.com"

# Add a volume pointing to /tmp
VOLUME /tmp

# Make port 8080 available to the world outside this container
EXPOSE 8080

# The application's jar file
ARG JAR_FILE=target/demo-docker-0.0.1-SNAPSHOT.jar

# Add the application's jar to the container
ADD ${JAR_FILE} demo-docker-0.0.1-SNAPSHOT.jar

# Run the jar file
ENTRYPOINT ["java","-Djava.security.egd=file:/dev/./urandom","-jar","/demo-docker-0.0.1-SNAPSHOT.jar"]
This Dockerfile is quite simple: let’s review it:
- FROM: this is the base Image we will use: adoptopenjdk/openjdk11:alpine-jre. If you prefer using JDK 8, switch to
openjdk:8-jdk-alpineimage as base image. - VOLUME: Volumes allow to persist data generated by the container on the Host, and share directories from the Host OS with the container.The
VOLUMEinstruction creates a mount point on the container with the specified path. When you run the container, you can specify the directory on the Hot OS to which the given mount point will be mapped to. After that, anything that the container writes to the mounted path is written to the mapped directory on the Host OS.In the aboveDockerfile, we created a mount point with path/tmpbecause this is where the spring boot application creates working directories for Tomcat by default. - EXPOSE: This instruction allows you to expose a certain port to the outside world.
- ARG: The
ARGinstruction defines a variable with a default value. You can override the default value of the variable by passing it at build time.ARG <name>[=<default value>] - ADD: The
ADDinstruction allows to copy new files and directories to the docker image. - ENTRYPOINT: This is the application entrypoint that is executed inside the container.
Save the Dockerfile in the current directory. Then, we will build and tag the application with:
docker build -t docker-demo .
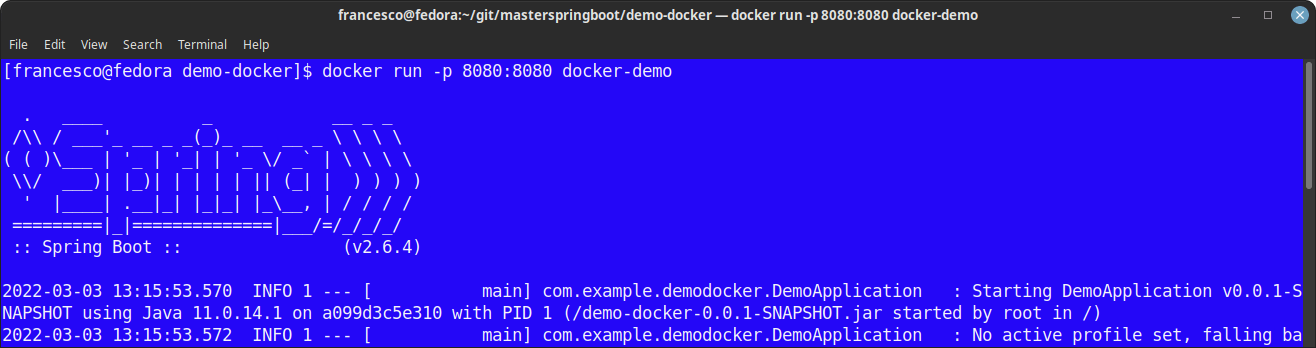
Finally, you can run it with:
docker run -p 8080:8080 docker-demo
The application will start on port 8080:
The source code for this example is available here: https://github.com/fmarchioni/masterspringboot/tree/master/demo-docker
Option #2 Use Spring Boot Maven plugin
This option does not require creating any other file. All you need, is adding to the spring-boot-maven-plugin a configuration option for image:
<plugin>
  <groupId>org.springframework.boot</groupId>
  <artifactId>spring-boot-maven-plugin</artifactId>
  <configuration>
    <image>
      <name>pedroluiznogueira/${project.artifactId}:${project.version}</name>
    </image>
    <pullPolicy>IF_NOT_PRESENT</pullPolicy>
  </configuration>
</plugin>
You can also specify a pullPolicy: acceptable values are ALWAYS, NEVER, and IF_NOT_PRESENT.
Next, to build it, you run:
mvn spring-boot:build-image
if you check the list of available Docker images, you will see that a new one is available:
$ docker images
REPOSITORY                                    TAG           IMAGE ID       CREATED          SIZE
docker-demo                                   latest        e861294b2bee   17 minutes ago   166MB
. . . .
pedroluiznogueira/pom-example                 0.0.3         d546b71161e4   42 years ago     275MB
Finally, run the Image as follows:
docker run -p 8080:8080 docker.io/pedroluiznogueira/pom-example:0.0.3
The Application will start:

Great! We just managed to run our first Spring Boot application on Docker!
The Source code for the second example is available here: https://github.com/pedroluiznogueira/docker-pom-example
Credits to the Java Software Engineer Pedro Luiz for sharing this example.
Keep learning Spring Boot and Containers
If you want to learn how to get your Dockerfile and image automatically created for you, then check this tutorial: How to build Docker images of your Spring Boot applications
If you want to learn how to deploy your Spring boot application on OpenShift check : How to run a Spring Boot application on Openshift.
Found the article helpful? if so please follow us on Socials


