In this article we will learn how to Connect to MongoDB using Spring Boot Data. We will use the MongoDBRepository Interface to simplify storage management of your data.
Getting started with MongoDB
MongoDB is a non-relational, document-oriented DBMS. Also known as as a NoSQL-type database, MongoDB differs from the traditional RDBMS structure in favour of JSON-style documents with dynamic schema (MongoDB uses the format BSON), making data integration of certain types of applications easier and faster.
The simplest way to get started with MongoDB is to fire the Docker image available.
Since we will be using it from our Spring Boot application, we will export the port 27017 to communicate with the DB:
docker run --name mydb --rm -p 27017:27017 -e MONGO_INITDB_ROOT_USERNAME=root -e MONGO_INITDB_ROOT_PASSWORD=password -v mdb-data:/data/db mongo
Also, notice we have set the environment variables MONGO_INITDB_ROOT_USERNAME and MONGO_INITDB_ROOT_PASSWORD as root username and password.
Next, we will connect to MongoDB using the Root user so that we can add some users for our Spring Boot application:
docker exec -it mydb bash
You are now in the Container. Launch the mongo command line tool with the Root credentials:
mongo --username root --password password
We will store our application users in the ‘admin’ database, therefore switch to the ‘admin’ db:
use admin
Finally, create the user “myuser” with password “mypassword”:
db.createUser({ user: "myuser" , pwd: "mypassword", roles: ["userAdminAnyDatabase", "dbAdminAnyDatabase", "readWriteAnyDatabase"]})
Check that the above command completed successfully:
Successfully added user: {
  "user" : "myuser",
  "roles" : [
    "userAdminAnyDatabase",
    "dbAdminAnyDatabase",
    "readWriteAnyDatabase"
  ]
}
Great! Your MongoDB is now ready. Let’s build our Spring Boot application which uses MongoDB as storage.
Setting up the Spring Boot application
If you are developing a simple Web application, all you need are two dependencies. From the CLI execute:
spring init -dweb,data-mongodb mongodb-demo
On the other hand, if you prefer using Spring Boot Initializr, use the following dependencies: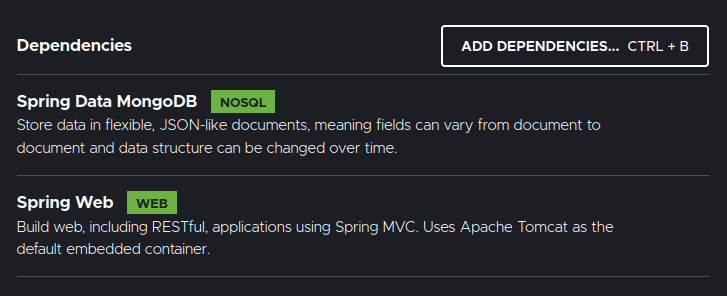
The following dependencies are now in your pom.xml:
<dependency>
  <groupId>org.springframework.boot</groupId>
  <artifactId>spring-boot-starter-data-mongodb</artifactId>
</dependency>
<dependency>
  <groupId>org.springframework.boot</groupId>
  <artifactId>spring-boot-starter-web</artifactId>
</dependency>
Before we start coding, we will add the connection settings for the MongoDB in application.properties. You can use an URI or discrete properties as in this example:
spring.data.mongodb.authentication-database=admin
spring.data.mongodb.username=myuser
spring.data.mongodb.password=mypassword
spring.data.mongodb.database=customer
spring.data.mongodb.port=27017
spring.data.mongodb.host=localhost
With that configuration in place, the Spring Boot application will connect to a local MongoDB instance with the above credentials. If you have a local instance without authorization enabled, you can just remove the first three lines of configuration.
Coding the Spring Boot Model
Firstly, we will define the Model of our application. Add the following Customer Class to your project:
package com.example.mongodbdemo;

import org.springframework.data.annotation.Id;
import org.springframework.data.mongodb.core.mapping.Document;

@Document
public class Customer {
  @Id
  private int customerId;
  private String name;
  private String surname;

  public int getCustomerId() {
    return customerId;
  }

  public void setCustomerId(int customerId) {
    this.customerId = customerId;
  }

  public String getName() {
    return name;
  }

  public void setName(String name) {
    this.name = name;
  }

  public String getSurname() {
    return surname;
  }

  public void setSurname(String surname) {
    this.surname = surname;
  }

}
MongoDB @Document annotation
Please note that we are using the annotation @Document to set the collection name for our Model. If the collection doesn’t exist, MongoDB will create it.
Writing the MongoDB repository to access our data
Next, we need to code the persistence layer to store and retrieve MongoDB documents. There are mainly two options to do that:
- MongoTemplate — this Interface provides a set of rich features for interacting with MongoDB and acts as a central class for Spring’s MongoDB support. This requires more coding but offers a finer control over custom MongoDB queries.
- MongoRepository — this interface provides all the necessary methods let you create a CRUD application. It also supports the custom derived query methods..
Let’s see at first how to use the MongoRepository interface. Hence, add the following CustomerRepository interface to your project:
package com.example.mongodbdemo;

import org.springframework.data.mongodb.repository.MongoRepository;
import org.springframework.stereotype.Repository;

@Repository
public interface CustomerRepository extends MongoRepository<Customer, Integer> {}
Defining the Spring Boot Controller
Next, let’s code the Controller Class which will manage the REST Endpoints of our application.
package com.example.mongodbdemo;

import java.util.List;
import org.springframework.beans.factory.annotation.Autowired;
import org.springframework.web.bind.annotation.*;

public class CustomerController {
  @Autowired
  private CustomerRepository repository;

  @PostMapping
  public String saveCustomer(@RequestBody Customer customer){
    repository.save(customer);

    return "Added Successfully";
  }

  @GetMapping
  public List<Customer> getCustomers() {

    return repository.findAll();
  }

  @DeleteMapping("/delete/{id}")
  public String deleteCustomer(@PathVariable int id){
    repository.deleteById(id);

    return "Deleted Successfully";
  }
}
Within the CustomerController Class we have added a @PostMapping method to store a Customer. Then, we have included a @GetMapping method to return all Customers. Finally, there’s a @DeleteMapping which lets you delete a Customer by its id.
As you can see, we didn’t have to write a single line of code to access the database apart from defining the repository interface and autowiring the dependency.
Testing the application
Finally, you can test your Spring Boot application:
mvn install spring-boot:run
Verify that the your Java Driver connects to the MongoDB instance:

Next, let’s add one Customer using the curl tool:
$ curl -X POST http://localhost:8080/add -H 'Content-Type: application/json' -d '{"id":"0","name":"Francesco","surname":"Marchioni"}'
Added Successfully
If your shell on MongoDB is still active, you can check the list of collections for the “customer” DB:
> use customer
switched to db customer
> db.customer.find()
{ "_id" : 0, "name" : "Francesco", "surname" : "Marchioni", "_class" : "com.example.mongodbdemo.Customer" }
Besides, you can use the following curl to list the available documents in the customer DB:
$ curl http://localhost:8080/list
[{"customerId":0,"name":"Francesco","surname":"Marchioni"}]
Finally, delete the customer with the following REST Command:
curl -X DELETE http://localhost:8080/delete/0
Deleted Successfully
Now, running the list of Customer objects will return an empty array.
Source code
The source code for this article is available here: https://github.com/fmarchioni/masterspringboot/tree/master/nosql/mongodb-demo
Found the article helpful? if so please follow us on Socials


