This article discusses how to secure a Spring Boot application with Keycloak Identity Server. At the end of it, will learn how to use the Spring Boot Keycloak starter which provides a set of configurable beans and support for various Keycloak features, such as authentication and authorization, user management, and client registration.
Keycloak is an open-source identity and access management solution that provides a centralized platform for managing authentication, authorization, and user management for modern applications. It is often used in enterprise environments to secure access to applications and APIs, and can be easily integrated with Spring Boot.
Pre-requisites:
- Install Keycloak from the Downloads link or, alternatively, start the Keycloak Docker Image
- Create an Administration user for Keycloak. In this example, we will use the Administrator admin (password “admin”)
After the installation. make sure that you start Keycloak server on port 8180 (to avoid conflicts with Spring Boot):
./kc.sh start-dev --http-port=8180
Creating the Keycloak Realm
Firstly, we need to create a Keycloak Realm that our Spring Boot application will use. In Keycloak terms, a realm represents a set of users, roles, and applications that you can manage together. In this section, we will use the kcadm.sh (available in the bin folder of Keycloak home directory) to create the realm “spring-realm”:
# Connects to the Keycloak server with admin/admin
./kcadm.sh config credentials --server http://localhost:8180 --realm master --user admin --password admin

# Creates the Realm spring-realm
./kcadm.sh create realms -s realm=spring-realm -s enabled=true -o

# Creates an user and set a password
./kcadm.sh create users -r spring-realm -s username=demo -s enabled=true
./kcadm.sh set-password -r spring-realm --username demo --new-password demo

# Create a Client for the Spring Boot application
./kcadm.sh create clients -r spring-realm -s clientId=simple-webapp -s publicClient="true"  -s "redirectUris=[\"http://localhost:8080/*\"]" -s enabled=true

# Create the Role "Users" and assign to the "demo" user
./kcadm.sh create roles -r spring-realm -s name=Users
./kcadm.sh add-roles --uusername demo --rolename Users -r spring-realm
When you execute the above commands, we will have the following elements in the spring-realm:
- Client Id: simple-web-app
- Redirects to: http://localhost:8080/*
- User/Password: demo/demo
- Roles: Users
Connect to Keycloak Admin console and verify that the Realm “spring-realm” contains all the above data:

Setting up the Spring Boot Project
Firstly, add to your Spring Boot project the Web Starter and Keycloak Starter:
<dependency>
	<groupId>org.keycloak</groupId>
	<artifactId>keycloak-spring-boot-starter</artifactId>
</dependency>

<dependency>
	<groupId>org.springframework.boot</groupId>
	<artifactId>spring-boot-starter-web</artifactId>
</dependency>
Next, we will add the Keycloak configuration. Instead of a keycloak.json file, you configure the realm for the Spring Boot adapter via the normal Spring Boot configuration in application.properties:
keycloak.auth-server-url=http://localhost:8180
keycloak.realm=spring-realm
keycloak.resource=simple-webapp
keycloak.public-client=true

keycloak.security-constraints[0].authRoles[0]=Users
keycloak.security-constraints[0].securityCollections[0].patterns[0]=/*
As you can see, the Spring Boot application will secure all endpoints (/*) with the Keycloak Client “simple-webapp” which belongs to the “spring-realm”.
Adding the Rest Controller
Next step will be adding a sample Spring Boot Controller to test that our Keycloak configuration works as expected.
@SpringBootApplication
public class CustomerAppApplication {

	public static void main(String[] args) {
		SpringApplication.run(CustomerAppApplication.class, args);
	}
}

@RestController
class CustomerController {

	@GetMapping(path = "/hello")
	public String helloKeycloak(){
		return "Hello from Keycloak secure server";

	}

	@GetMapping("/user")
	public String getCurrentUser(KeycloakPrincipal<KeycloakSecurityContext> principal) {
		KeycloakSecurityContext keycloakSecurityContext = principal.getKeycloakSecurityContext();
		AccessToken accessToken = keycloakSecurityContext.getToken();
		String currentUser = accessToken.getPreferredUsername();
		Set<String> roles = accessToken.getRealmAccess().getRoles();
		return "Current user: " + currentUser + " - Roles: " + roles;
	}
}
This RestController contains two methods:
- The /hello endpoint merely prints a text message after successful login
- The /user endpoint prints the information from the KeycloakSecurityContext. For example, we can extract the current User and its Roles
Finally, build and start the application with:
mvn install spring-boot:run
The Spring Boot application by default will start on port 8080. Then, access any endpoint. For example http://localhost:8080/user
The username/password prompt from Keycloak will display:

Enter the user credentials (demo/demo).
You should be able to see the User information:
Current user: demo - Roles: [offline_access, default-roles-spring-realm, uma_authorization, Users]
Configuring Confidential access type
The spring-realm defines its OIDC client as public access type. You can find this setting in the Client configuration:
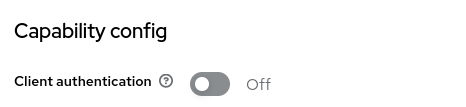
If you want to set to confidential access type, switch to On the Client Authentication. A new Tab “Credentials” will be available in the Client configuration. From there, you can collect the Secret that will be exchanged during the Client Authentication:

In terms of configuration, you will need to add the Client secret in your application.properties:
keycloak.credentials.secret = 0GkyEyKK7OFZb0Fo7ogfOA1N0okCRue2
Configuring multiple Constraints in your application
Finally, it is worth mentioning that you can define arrays of securityConstraints in your application.properties to allow specific constraints for URL patterns. For example:
keycloak.securityConstraints[0].authRoles[0] = admin
keycloak.securityConstraints[0].authRoles[1] = user
keycloak.securityConstraints[0].securityCollections[0].name = general stuff
keycloak.securityConstraints[0].securityCollections[0].patterns[0] = /public

keycloak.securityConstraints[1].authRoles[0] = admin
keycloak.securityConstraints[1].securityCollections[0].name = admin stuff
keycloak.securityConstraints[1].securityCollections[0].patterns[0] = /admin
Conclusion
By following the steps in this tutorial, you can easily integrate Keycloak with your Spring Boot application and secure it with modern, centralized authentication and authorization.
Source code for this tutorial: https://github.com/fmarchioni/masterspringboot/tree/master/security/keycloak-demo
Found the article helpful? if so please follow us on Socials


